Adding A Content View
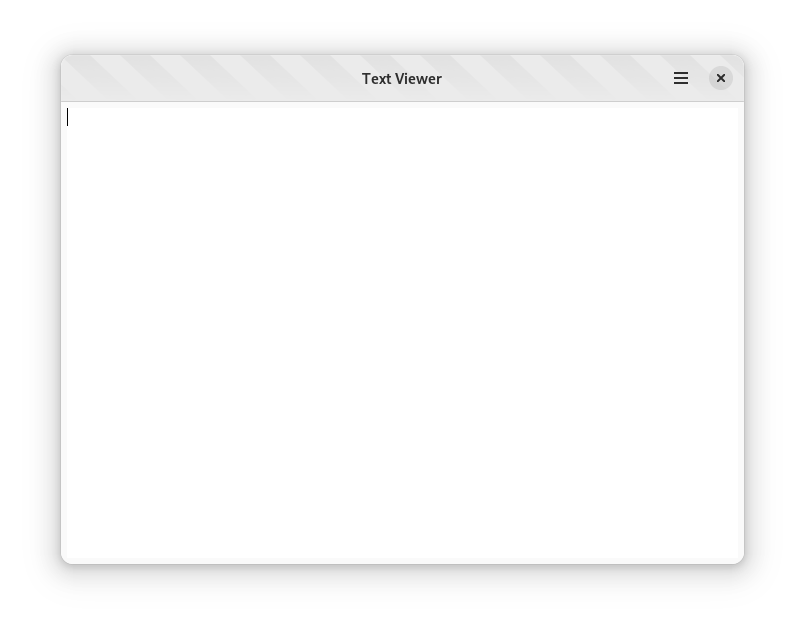
In this lesson, you will learn how to modify the UI definition file of the application’s window to add a text area UI element. The text area will be used to display the contents of a text file that we are going to load in the next lesson.

Any GNOME application is composed of a hierarchy of UI elements, called widgets; GTK allows defining UI using XML instead of writing them in code. The default template for GNOME applications provided by Builder uses a UI definition file for the main application window, and we are going to edit it like any other file.
- Open the
text-viewer-window.uifile under thesrcdirectory - The window is defined as a template element for the
Text-Viewer-Windowclass - The window has property elements, which describe the value for the various properties; for instance, setting the default title of the window will be set using the
titleproperty - The window also has two child elements
- the first child element is a
Adw::HeaderBar, and it is used to describe the contents of the header bar; in this case, aGtk::MenuButtonwith the primary menu of the application - the second child element is the main content area of the window
- the first child element is a
- Currently, the main content is provided by a
Gtk::Labelwidget, with a “Hello, World!” label - Outside the template block, you can find the definition of the menu using the menu element
Set the title of the main window
- Find the
Text-Viewer-Windowdefinition - Find the property elements that define the default width and height of the window
- Add the following property:
<template class="Text-Viewer-Window" parent="AdwApplicationWindow">
  <property name="default-width">600</property>
  <property name="default-height">300</property>
  <property name="title">Text Viewer</property>
  <property name="content">
    <object class="AdwToolbarView">
Set the development style for the main window
The devel style communicate to the user that the application is a development snapshot.
- Find the
Text-Viewer-Windowdefinition - Add the following style:
<template class="Text-Viewer-Window" parent="AdwApplicationWindow">
  <property name="default-width">600</property>
  <property name="default-height">300</property>
  <property name="title">Text Viewer</property>
  <style>
    <class name="devel"/>
  </style>
  <property name="content">
    <object class="AdwToolbarView">
Add a scrollable container
Follow these steps to add a scrollable container to the window:
- First, you need to remove the the UI element that is already in the window. Find the object element that defines the
Gtk::Label, and remove the whole block - Add the following UI definition for a scrollable container inside the property element for the
contentproperty:
<property name="content">
  <object class="GtkScrolledWindow">
    <property name="hexpand">true</property>
    <property name="vexpand">true</property>
    <property name="margin-top">6</property>
    <property name="margin-bottom">6</property>
    <property name="margin-start">6</property>
    <property name="margin-end">6</property>
  </object>
</property>
The definition of the scrollable container has the following properties:
hexpandandvexpandtell the container to expand to fit the whole area of the parent windowmargin-top,margin-bottomtell the container to add a margin of six pixels at the top and bottom edges, respectivelymargin-startandmargin-endtell the container to add a margin of six pixels at the leading and trailing edges, respectively; the leading and trailing edges are determined by the text direction
Add a text view
Follow these steps to add a text view widget to the scrollable container:
- Add a new property element for the child property:
<property name="content">
  <object class="GtkScrolledWindow">
    <property name="hexpand">true</property>
    <property name="vexpand">true</property>
    <property name="margin-top">6</property>
    <property name="margin-bottom">6</property>
    <property name="margin-start">6</property>
    <property name="margin-end">6</property>
    <property name="child">
    </property>
  </object>
</property>- Add an object definition for the
Gtk::TextViewwidget, and assign themain_text_viewas its identifier
<property name="content">
  <object class="GtkScrolledWindow">
    <property name="hexpand">true</property>
    <property name="vexpand">true</property>
    <property name="margin-top">6</property>
    <property name="margin-bottom">6</property>
    <property name="margin-start">6</property>
    <property name="margin-end">6</property>
    <property name="child">
      <object class="GtkTextView" id="main_text_view">
        <property name="monospace">true</property>
      </object>
    </property>
  </object>
</property>
Bind the text view in the source code
Templates represent the structure of a UI bound to a specific class; in this case, the UI definition of the Text-Viewer-Window class. In order to access a UI element from within the class, you must assign an identifier, using the id XML attribute, to the definition in the XML, and tell GTK to bind the object with the same identifier to a member in the instance structure.
- Open the
window.crfile - Find the
Windowclass in theText::Viewernamespace - Replace the
labelwith themain_text_view
module Text::Viewer
  @[Gtk::UiTemplate(
    resource: "/com/example/TextViewer/text-viewer-window.ui",
    children: {
      "header_bar",
      "main_text_view",
    }
  )]
  class Window < Adw::ApplicationWindow
    include Gtk::WidgetTemplate

    @header_bar = Adw::HeaderBar
    @main_text_view : Gtk::TextView

    def initialize
      super()

      @header_bar = Adw::HeaderBar.cast(template_child("header_bar"))
      @main_text_view = Gtk::TextView.cast(template_child("main_text_view"))
    end
  end
end
Now you can run it using $ crystal run src/text-viewer.cr or $ make run
In the next lesson, you will learn how to select a file and load its contents into the text area.